TPO Roof Repair: The 5 Most Common Failures and How Pros Fix Them
| By TriVAN Roofing | 17 min read
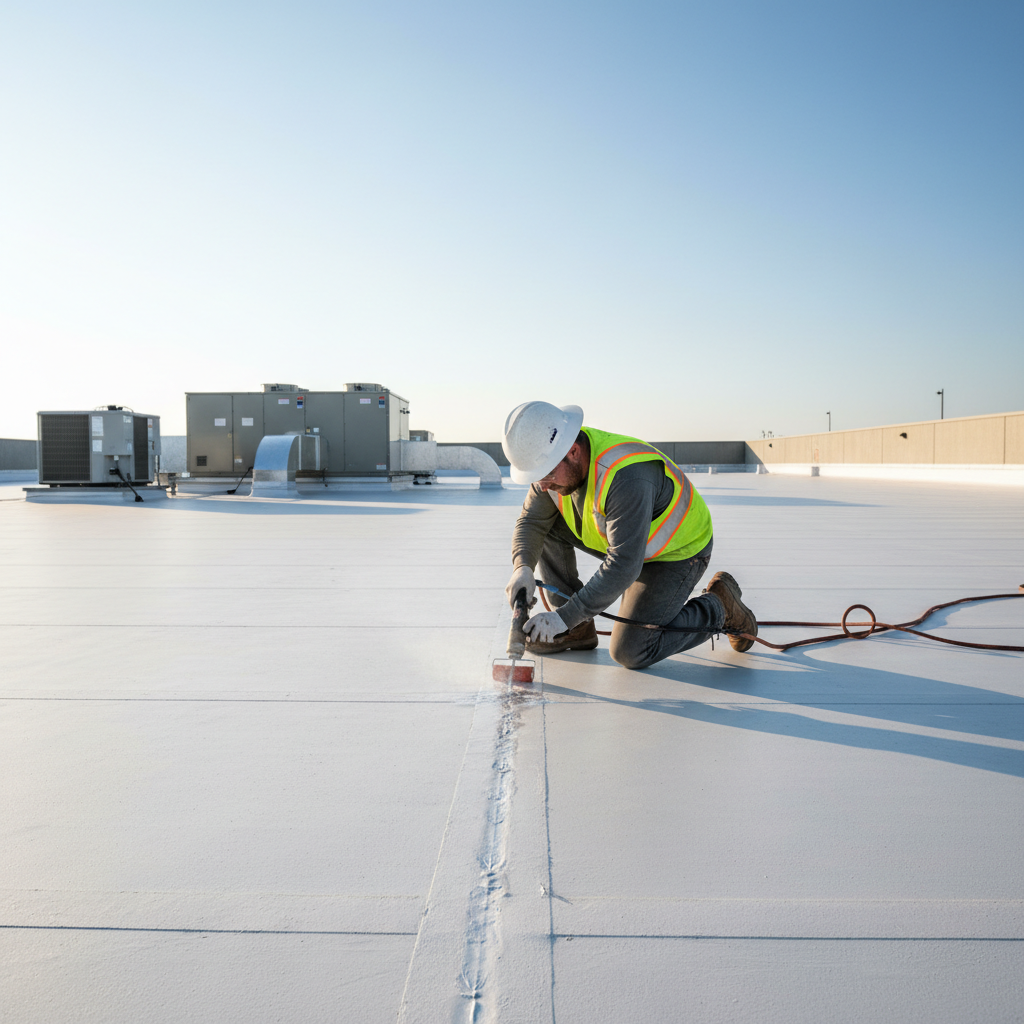
Learn how commercial contractors diagnose and repair the five most frequent TPO roof failures in Texas, from seam separation to heat crazing, including exact repair costs and key replacement thresholds.
Categories: Roofing Materials
Thermoplastic Polyolefin (TPO) covers more commercial roofing square footage across Texas than any other single-ply membrane. Property managers and facility directors favor TPO for its reflective white surface, energy efficiency under intense sun, and competitive initial installation cost. However, the operational environment across Texas and Oklahoma places extraordinary physical demands on flat commercial roofs. Blistering summer roof temperatures routinely exceeding 160 degrees Fahrenheit, frequent hail storms, sudden seasonal cold snaps, and intense thermal cycling create a severe degradation environment. These regional factors accelerate membrane wear far faster than in temperate northern climates.
When leaks occur or routine inspections uncover visible roof flaws, commercial building owners often face confusing assessments. Is an open seam an isolated issue or evidence of systemic failure? Can a puncture be patched simply, or has water saturated the underlying polyisocyanurate insulation? Understanding the mechanics of commercial TPO roofing systems empowers facility managers to make informed, financially sound decisions. This guide details the five most common TPO roof failure modes, explains how factory-certified roofing professionals perform permanent repairs, provides current industry repair cost estimates, and outlines when to repair versus replace your roof.
The Physics of TPO Failure in the Texas Climate
Single-ply TPO membranes consist of three distinct bonded layers: a thermoplastic polyolefin base layer, an internal polyester woven scrim that provides tensile strength, and a specialized thermoplastic top cap containing ultraviolet inhibitors and thermal stabilizers. Unlike thermoset materials like EPDM rubber, which rely on adhesive tapes and chemical glues, TPO sheets fuse together via hot-air welding. The polymer chains melt together under intense heat and mechanical pressure to form a cohesive, monolithic seam.
While the seam weld is structurally stronger than the surrounding membrane when installed correctly, Texas weather exposes every component to intense strain. Research published in the Western States Roofing Contractors Association (WSRCA) Technical Advisory No. 12 revised in April 2025 demonstrated that heat load, rather than ultraviolet radiation alone, serves as the primary degradation mechanism for TPO membranes in southern regions like San Antonio and North Texas. Prolonged exposure to high temperatures gradually bakes volatile stabilization additives out of the upper polymer cap layer.
As these additives deplete, the membrane gradually loses elasticity and shrinks. Rapid temperature swings, such as a 95-degree Texas afternoon followed by a sudden severe thunderstorm dropping ambient temperatures by 30 degrees in an hour, induce extreme thermal shock. The expanding and contracting membrane places enormous shear stress on welded seams, perimeter terminations, and penetration flashings. Understanding these physical forces clarifies why the five common failure modes detailed below occur and how professionals repair them permanently.
Failure 1: Seam Separation and Delamination
Seam separation represents the most common TPO failure mode documented across commercial flat roofs. A field study conducted by the WSRCA evaluating commercial TPO installations found physical micro-cracking and early seam stress in San Antonio test locations within just seven years of service. Furthermore, Lane Roofing's 2026 commercial field analysis confirms seam detachment as the leading cause of single-ply moisture infiltration.
Why TPO Seams Fail
Seams detach due to three primary factors: improper initial installation, continuous thermal cycling, and advanced material aging. During original construction, robotic hot-air welders must maintain an exact balance of temperature, travel speed, and downward roller pressure. If a technician operates the welder too quickly, welds at inadequate heat settings, fails to clean dust off the weld zone, or fails to calibrate equipment for windy rooftop conditions, a "cold weld" occurs. Cold welds create an initial adhesive tack that passes initial inspection but lacks true molecular fusion.
Over several years of Texas thermal expansion and contraction, these weakly bonded seams split open. Even properly welded seams experience continuous shear stress along overlap edges. As the upper membrane sheet naturally shrinks and stiffens over its service life, the mechanical tension concentrated along the weld line eventually causes edge delamination.
How Professionals Repair TPO Seams
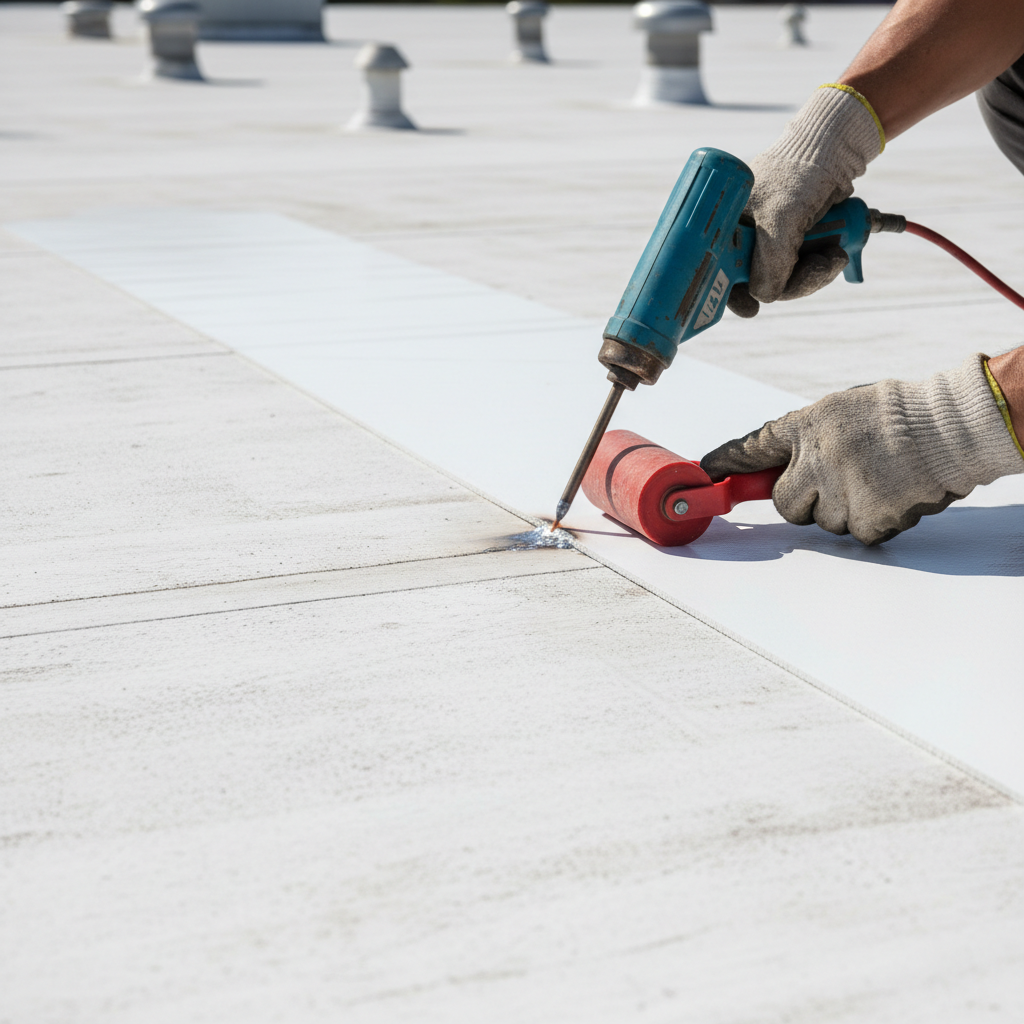
Applying topical sealants, mastics, or silicone caulk directly over a failed seam does not constitute a professional repair. Sealants act merely as temporary emergency band-aids that lack structural elongation, failing rapidly under the membrane's routine expansion cycles. Professional TPO seam repair requires true thermal reconstruction:
- Substrate Cleaning and De-Oxidation: The technician thoroughly cleans the opened seam and surrounding membrane with a specialized, residue-free TPO solvent cleaner to remove years of accumulated atmospheric soot, grime, and oxidation oils.
- Mechanical Probing: The contractor uses a blunt-nosed steel inspection probe along the entire suspect run to determine exactly where sound molecular fusion resumes, ensuring no hidden voids remain.
- Weld Zone Priming: On aged membranes with surface oxidation, technicians apply a manufacturer-approved single-ply primer to prepare the aged polymer chains for heat integration.
- Cover Strip Heat-Welding: The professional cuts a new strip of reinforced or unreinforced TPO membrane (minimum six inches wide) and centers it over the separated joint. Using a calibrated handheld hot-air heat gun operating between 800 and 1,000 degrees Fahrenheit, the technician fuses the new membrane strip over the failed seam while applying continuous pressure with a silicone roller.
- Edge Sealing: Technicians inspect the welded perimeter with a metal probe and apply manufacturer-specified cut-edge sealant along any exposed polyester scrim edges to prevent future water wicking.
Repair Cost Expectations
According to flat roof industry cost data published by Lane Roofing and AskDoss in 2026, professional hot-air welded seam repairs typically range from $300 to $800 per localized separation area. If an aging commercial roof exhibits widespread seam failure across multiple zones, repairing 8 to 15 seam runs quickly increases the total cost to $2,400 to $12,000. When repair expenses reach this level, facility owners should consult a comprehensive commercial roof repair cost breakdown to determine whether continued patching remains economically sensible.
Failure 2: Punctures, Mechanical Tears, and Impact Cuts
Unlike seam separation, which develops gradually over years, punctures and tears happen abruptly. Because TPO is a single-ply membrane without the redundant layers found in built-up asphalt roofs, any breach through the sheet exposes underlying insulation and interior ceilings directly to rainwater.
Common Causes of Rooftop Punctures
Third-party mechanical traffic causes the overwhelming majority of membrane punctures. HVAC service personnel, refrigeration technicians, and communications contractors frequently drop sharp screws, utility knives, drill bits, and heavy access panels on unpadded membrane surfaces. Walking heavily over dropped fasteners easily drives them through the TPO sheet.
Severe Texas storms also drive substantial puncture rates. Large hail impacts directly breach older, heat-hardened membranes instead of merely denting the cover board below. Windstorms sweep heavy tree branches, unfastened metal equipment doors, and foreign debris across the open roof field at violent speeds, producing severe gouges and tears.
Professional Puncture Repair Procedures
Field repair guides, including Castagra's 2026 commercial roofing analysis, emphasize that punctures require structured heat-welded patches rather than topical squeeze-tube pastes:
- Moisture Verification: The technician cuts an exploratory slit or performs a non-destructive moisture meter test at the breach point. If insulation beneath the puncture is saturated, wet insulation boards must be cut out and replaced with dry matching material before repairing the surface.
- Patch Sizing: Technicians cut a patch from matching TPO membrane stock. Per Lane Roofing guidelines, the patch must extend at least six inches in all directions beyond the outer limits of the puncture or tear.
- Corner Rounding: The patch corners are carefully rounded using shears. Sharp 90-degree corners create stress-concentration points that catch foot traffic and peel up prematurely under heavy wind scour.
- Chemical Formulation Matching: The replacement patch must match the original roof material. Welded bonds fail quickly when technicians weld newer, chemically incompatible formulation blends or different plasticizer compounds onto aged membranes.
- Full Perimeter Fusion: The repair patch is positioned, tacked into place, and fully hot-air welded using calibrated hand equipment and steady roller compression, creating a permanent, watertight seal.
Industry best practices documented by Castagra recommend grouping seam repairs and puncture repairs into a single service call. Combining multiple minor repairs during one scheduled mobilization significantly reduces total trip fees and equipment setup costs.
Repair Cost Expectations
Standard puncture repairs typically cost between $300 and $500 per puncture location. However, if a puncture has remained undetected for months and allowed gallons of rainwater to saturate the underlying polyisocyanurate insulation, core extraction, insulation replacement, and substrate deck repairs can push individual repair costs above $1,200 to $1,800 per site.
Failure 3: Flashing Failures at Curbs, Pipes, and Penetrations
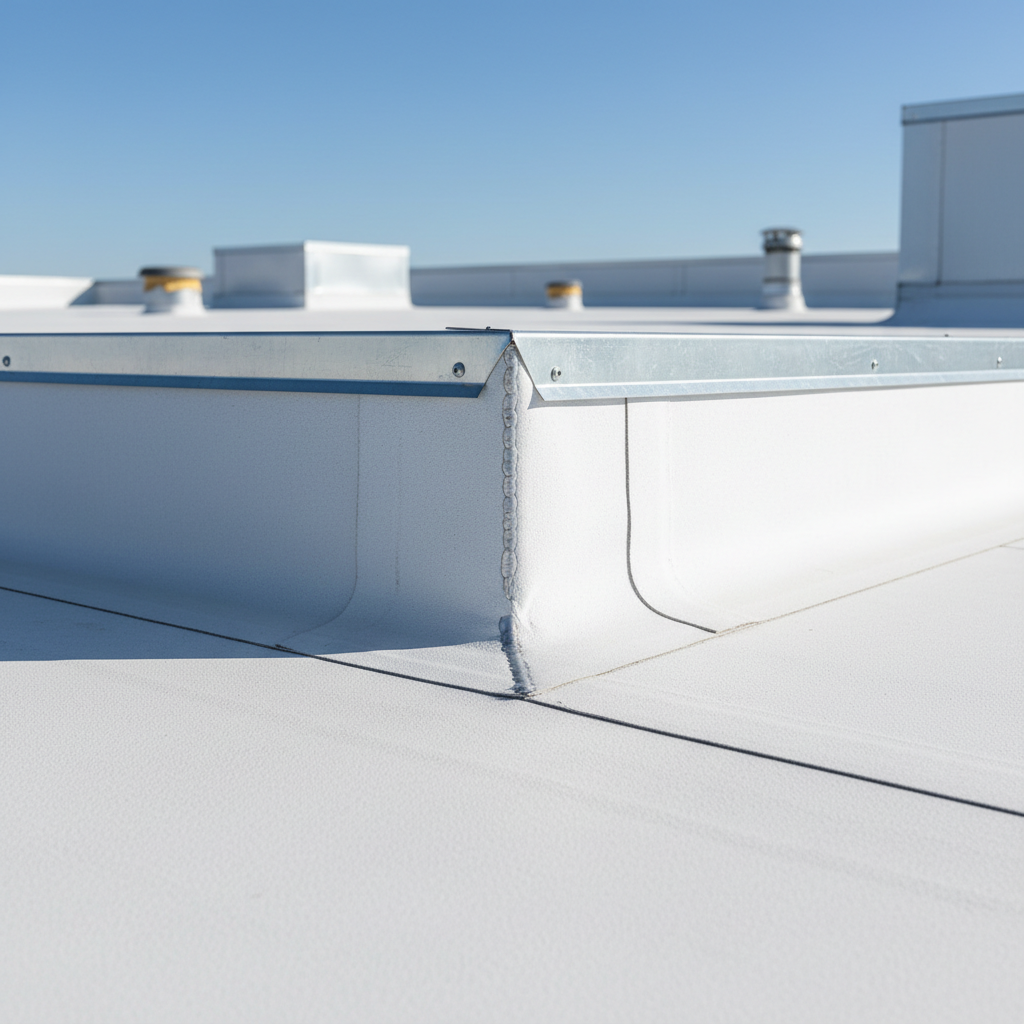
Statistically, penetrations and flashing terminations represent the origin point for over 70% of reported flat roof leaks, even when water enters interior rooms tens of feet away from the rooftop penetration. Flashing assemblies bridge transitions where horizontal roof fields terminate against vertical brick parapets, metal equipment curbs, plumbing vent pipes, structural roof drains, and electrical conduits.
Why Flashings Deteriorate
Flashing assemblies endure severe physical stress. Large rooftop HVAC units vibrate constantly during peak summer cooling cycles, vibrating the curbs they sit upon. Parapet walls settle, expand, and contract at rates different from the main roof deck. This structural differential movement places constant shear tension on flashing boots and vertical membrane laps.
Furthermore, improper installation practices documented in JLC Online's commercial troubleshooting studies frequently compromise flashings from day one. Inexperienced roofers often install flashing details relying on topical polyurethane caulk or unreinforced flashing tapes at sheet metal joints rather than executing manufacturer-mandated, heat-welded TPO flashing overlays. When exposed to harsh Texas sun and rapid weather changes, simple caulked joints dry out, shrink, crack, and separate within 24 to 36 months, allowing water to track behind the membrane.
The Professional Flashing Restoration Process
Fixing an opened penetration requires stripping away old materials and rebuilding the flashing assembly correctly:
- Removal of Failed Materials: Technicians strip away cracked mastic, hardened sealants, and detached temporary tapes down to the bare, structural curb or pipe substrate.
- Targeted Leak Diagnostics: Because water travels along roof decks before entering ceilings, specialists often perform professional commercial roof leak detection to confirm the penetration is the true water pathway.
- Mechanical Fastener Inspection: Technicians inspect, tighten, or replace loose mechanical termination bars and flashing screws along the curb wall, ensuring sound physical anchoring to the structure.
- Hot-Welded Target and Wrap Installation: Mechanics install factory-molded TPO pipe boots or fabricate custom multi-piece field wraps around irregular penetrations. They fuse the horizontal flange to the roof field using hot air while wrapping the vertical collar securely up the pipe or curb wall.
- Counterflashing Integration: Flashing tops are anchored with an aluminum termination bar, filled with high-grade commercial polyurethane sealant behind the lip, and shielded with a continuous sheet metal counterflashing or stainless steel clamping draw-band.
Repair Cost Expectations
Industry data from AskDoss indicates standard TPO penetration and flashing repairs average $400 to $1,000 per penetration area. Simple cylindrical plumbing boots fall toward the lower end ($400 to $550), while complex, oversized HVAC curb flashings with multiple conduit tie-ins, gas lines, and structural corners easily reach $800 to $1,200 per unit.
Failure 4: Membrane Surface Degradation and Heat Crazing
Unlike localized punctures or opened seams, surface degradation is a systemic, material-level breakdown across the entire membrane. Building owners must recognize this issue early to avoid spending thousands of dollars on ineffective localized patches.
The Science of TPO Crazing
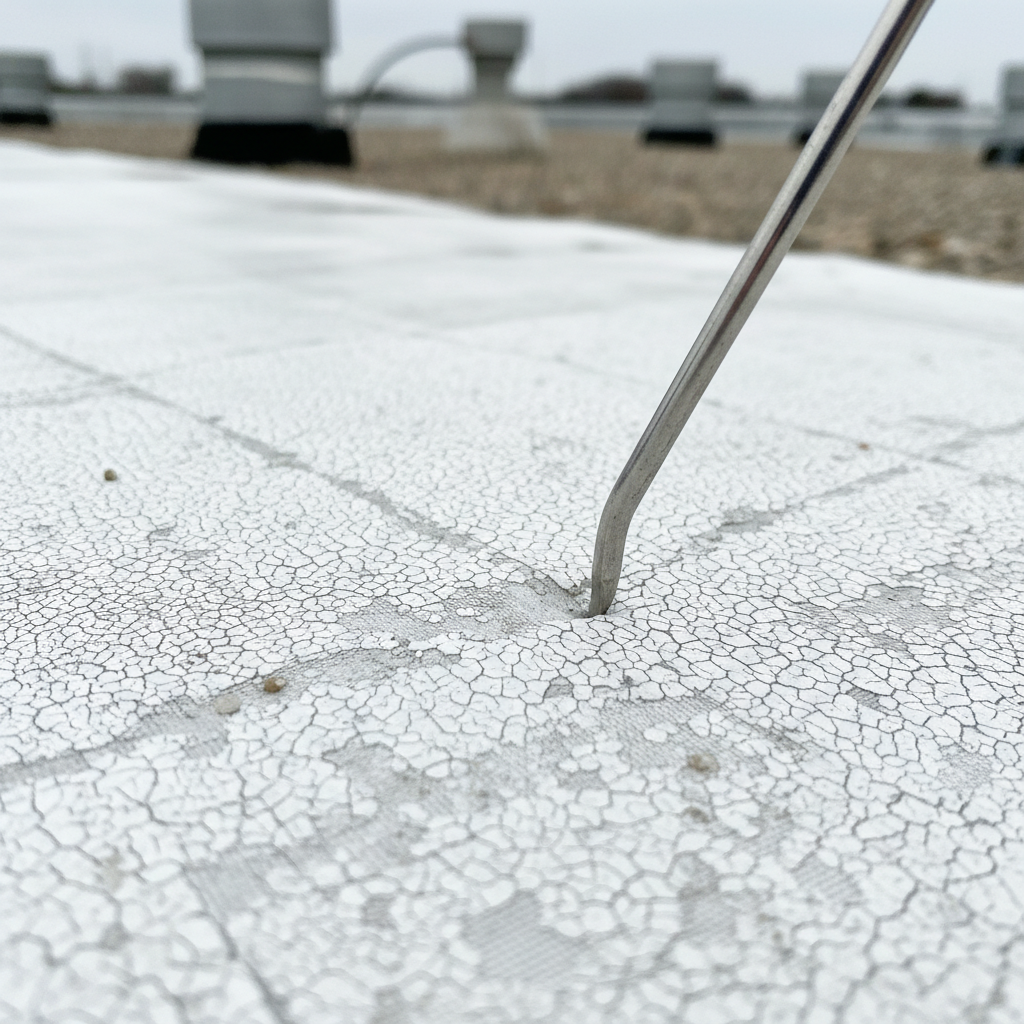
The WSRCA Technical Advisory No. 12 confirms that prolonged heat exposure accelerates the degradation of commercial TPO membranes. When exposed to years of high solar heat and surface temperatures exceeding 160 degrees, the membrane's protective polymer cap layer gradually loses its essential chemical stabilizers. This process results in membrane embrittlement, loss of elasticity, and thickness reduction directly over the reinforcing polyester scrim.
The earliest visual warning sign is surface crazing, which appears as fine, web-like micro-cracking across the membrane surface. As degradation advances, these micro-cracks deepen into open fissures that expose the internal reinforcing fibers to solar degradation and water absorption, leading to widespread leaks.
Repair vs. Restoration Approach
Surface crazing is a systemic, material-level degradation mechanism rather than a localized defect. Attempting to apply small weld patches over crazed membrane proves futile because the surrounding sheet lacks the necessary resin integrity to fuse securely. When an aging roof exhibits advanced crazing, facility managers must choose between full-scale restoration or replacement:
- Fluid-Applied Roof Coating Systems: If crazing is caught in early stages before moisture penetrates the insulation, a high-solids silicone or elastomeric acrylic fluid-applied coating system can restore the roof. According to technical specifications compiled by InspectAndTest in 2026, a properly applied coating over a clean, sound membrane can extend roof service life by 10 to 15 years.
- Strict Coating Pre-Conditions: Coatings should never be applied over structurally failed membranes. InspectAndTest notes that coating over wet insulation, unbonded seams, or heavily rotted scrim traps internal moisture. Trapped moisture quickly causes widespread blisters, destroys remaining insulation, rots structural decking, and accelerates system failure.
- System Replacement: If micro-cracks penetrate the scrim across more than 15% to 20% of the total roof surface, the membrane is past the point of coating restoration and requires full replacement.
Cost Expectations
Attempting to fix crazing with localized patches is a waste of money. If the roof qualifies for a commercial fluid-applied silicone restoration system, costs typically range from $3.50 to $6.50 per square foot. While this requires a larger budget than localized repairs, it costs 50% to 60% less than a full roof tear-off and replacement while renewing warranty protection.
Failure 5: Membrane Shrinkage at Perimeter Terminations
All single-ply thermoplastic membranes shrink slightly as volatile chemical components dissipate over decades of weathering. While modern TPO membranes incorporate internal polyester scrims to resist shrinkage, continuous thermal cycling across Texas can still cause measurable membrane contraction over 10 to 15 years.
How Perimeter Tension Causes Leaks
Because commercial roofs are mechanically fastened or fully adhered across large fields, shrinkage tension naturally migrates outward toward perimeter boundaries. This continuous tension creates substantial stress along parapet walls, gravel stops, coping cap assemblies, and roof edge terminations.
As the membrane contracts, it exerts steady outward tension, pulling aluminum termination bars away from vertical masonry walls, loosening anchor fasteners, and lifting edge metal seams. Once perimeter termination bars pull free, driving rains enter behind the membrane, running unchecked down interior exterior walls.
The Professional Perimeter Repair Process
Fixing perimeter shrinkage requires relieving mechanical tension rather than simply installing larger screws:
- Tension Relief Cutting: Technicians make controlled cuts along the bottom angle change where the horizontal deck meets the vertical parapet wall, immediately relieving tension on the field membrane.
- Substrate Fastener Reinforcement: The horizontal field sheet is re-secured to the structural roof deck along the perimeter using heavy-duty barbed seam plates and commercial fasteners spaced every 6 to 12 inches to anchor the field permanently.
- New Flashing Transition: Workers install a brand new TPO membrane skirt over the transition zone. The lower edge is hot-air welded at least six inches past the tension relief cut onto the field sheet.
- Vertical Termination Re-Anchoring: The vertical membrane run is set flush against the wall, secured with a new aluminum termination bar, anchored into solid masonry, and sealed along the top lip with commercial-grade polyurethane sealant.
Repair Cost Expectations
Relieving and rebuilding strained perimeter terminations is more labor-intensive than patching flat field seams. Professional perimeter repairs generally run between $35 to $65 per linear foot, depending on wall height, accessibility, coping details, and the extent of masonry anchoring required.
The Repair vs. Replacement Decision Framework
When commercial roofs develop leaks, facility managers often struggle to decide whether to continue spot repairs or invest in complete roof replacement. Using a clear decision framework prevents wasted repair spending on systems nearing the end of their usable life.
| Evaluation Metric | Strong Repair Candidate | Replacement / Restoration Indicated |
|---|---|---|
| System Age | Under 10 to 12 years old | Over 15 to 18 years old |
| Failure Distribution | Isolated to 1-3 specific penetration or puncture points | Systemic across multiple zones; widespread seam delamination |
| Membrane Elasticity | Pliable, clean white surface, smooth cap layer | Brittle, visible crazing, exposed reinforcement scrim |
| Insulation Substrate | Dry, solid, fully structurally supportive | Soft spots, extensive wet insulation board, deck corrosion |
| Cumulative Repair Cost | Under 15% of total replacement cost | Approaching or exceeding 25% of total replacement cost |
The expected lifespan of a commercial TPO roof in Texas typically ranges from 15 to 22 years, depending on membrane thickness (45-mil versus 60-mil or 80-mil) and maintenance history. If a 16-year-old roof experiences widespread seam separation, paying $6,000 for localized repairs often only delays unavoidable replacement by a few months. Conversely, spending $1,200 to repair dropped-tool punctures on an eight-year-old roof protects your investment and keeps the system performing reliably for years.
The 25% economic rule provides clear guidance: whenever cumulative repair estimates across a commercial roof approach 25% to 30% of total replacement cost, ongoing repairs are rarely cost-effective. At that stage, capital replacement delivers a better return on investment, lower lifecycle costs, and renewed manufacturer warranty coverage.
Trapped Moisture and Diagnostic Technology
You cannot accurately evaluate a damaged TPO roof through visual inspection alone. Because TPO sheets are non-porous, water entering through a tiny seam crack or puncture often cannot evaporate back out. Instead, it spreads horizontally beneath the membrane, saturating the porous polyisocyanurate insulation boards and underlying gypsum cover boards.
Saturated insulation loses up to 90% of its thermal resistance (R-value), driving up your facility's energy bills. More critically, trapped moisture deteriorates metal decking, creates structural rust, breeds mold, and breaks down the adhesive holding fully adhered roofing systems together.
Before commissioning major repairs or planning a roof coating, facility managers should schedule an infrared thermal roof inspection. Thermal imaging cameras detect subtle differences in heat retention across the roof deck after sunset. Wet insulation holds solar heat longer than dry insulation, allowing diagnostic technicians to pinpoint exact sub-surface moisture boundaries on a digital map. This ensures contractors replace all wet insulation cores during repair work, preventing trapped moisture from rotting the roof deck from within.
Proactive Maintenance for Texas Commercial Facilities
Preventative maintenance consistently proves far less expensive than emergency roof repairs. Facility managers can stop minor defects from developing into major structural leaks by implementing a systematic care plan:
- Schedule Biannual Professional Inspections: Inspect the roof each spring before severe storm activity and each autumn after peak summer heat. Have technicians focus on high-stress zones, such as roof corners, building perimeters, and areas near heat-generating exhaust equipment.
- Conduct Timely Post-Hail Assessments: Schedule a prompt professional inspection after major hailstorms. Hailstones can create hairline fractures in TPO membranes that show no immediate interior leaks but will fail during subsequent rain events. Catching hail damage early also simplifies commercial insurance documentation.
- Clear Roof Drains and Scuppers: Ensure drains, internal sumps, and perimeter scuppers remain clear of leaves and debris before and after heavy rainfall seasons. Standing ponding water that remains on a TPO roof longer than 48 hours accelerates surface heat degradation and invalidates many standard manufacturer warranties.
- Establish Strict Rooftop Trade Protocols: Maintain a mandatory rooftop access log for all HVAC, electrical, and maintenance technicians. Require third-party contractors to use protective walkway pads when servicing equipment, minimizing dropped-tool punctures and heavy foot traffic wear.
- Enroll in an Asset Management Program: Enrolling your building in a structured commercial roof asset management program establishes detailed historical maintenance logs, tracks minor repairs, provides emergency response priority, and helps preserve valuable manufacturer warranties.
Choosing the Right TPO Repair Contractor
Repairing a single-ply TPO roof requires specialized technical training and commercial hot-air welding equipment. General handymen and residential contractors who rely on elastomeric roof caulk, asphalt mastic, or peel-and-stick tapes cannot deliver permanent, code-compliant repairs on commercial TPO membranes.
When selecting a commercial roofing contractor to evaluate and service your facility, always verify their commercial credentials:
- Direct Factory Certification: Select contractors holding Elite or Master-level certifications from premier single-ply manufacturers like Duro-Last and GAF. Factory-certified installers have direct access to matching membrane formulations, factory technical support, and authentic warranty extension programs.
- Dedicated Commercial Equipment: Confirm that the contractor's repair technicians operate commercial hot-air welding equipment, carry digital probe testing tools, and follow precise manufacturer repair standards.
- Regional Experience: Work with an established regional contractor that understands Texas weather patterns, seasonal thermal movement, and local municipal commercial building codes.
- Comprehensive Warranty Options: Ensure your contractor can provide clear workmanship warranties on targeted repairs, along with transferable No Dollar Limit (NDL) warranty options when executing complete restorations or system replacements.
Taking a proactive, technically sound approach to commercial TPO roof repair protects your facility, safeguards interior assets, and maximizes the service life of your roofing investment.
---Tags: TPO roof repair, TPO roof repair cost, TPO seam repair, TPO membrane repair, TPO roof leak repair, how to repair TPO roof, TPO roof repair Texas, commercial TPO roof repair, TPO roof seam separation repair, TPO flashing repair