Emergency Commercial Roof Repair in Texas: Your 24-Hour Guide to Costs, Actions, and Avoiding Scams
| By TriVAN Roofing | 12 min read
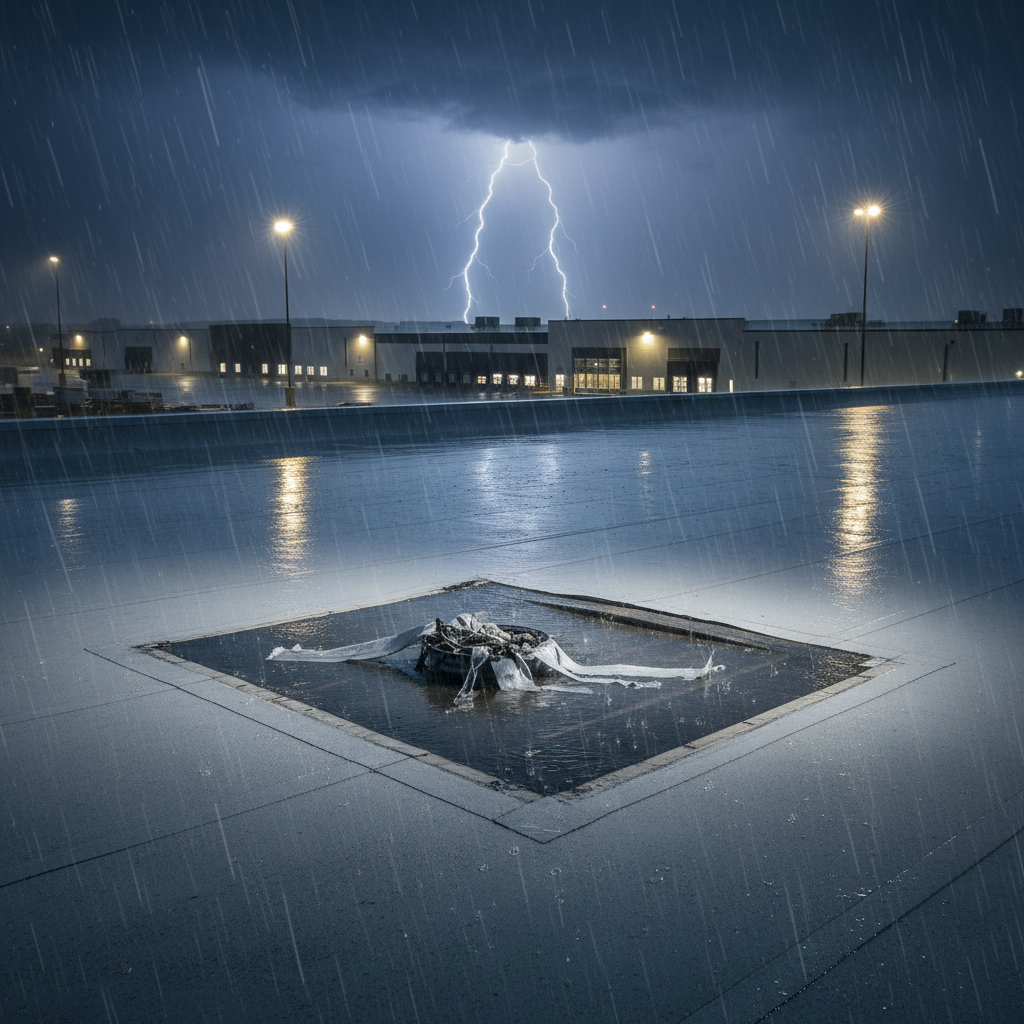
Facing an emergency commercial roof leak in Texas? Get immediate steps for the first 24 hours, understand repair costs, and learn how to avoid predatory contractors. Your guide to stabilizing your facility and making smart decisions during a crisis.
Categories: Weather & Climate
Water is pouring into your facility at 11 p.m. during a torrential Texas thunderstorm. This is not a time for research. It is a time for action. If you are a facility manager facing a roofing emergency right now, stop reading and follow these steps. This guide is built to give you immediate, practical instructions first, then context later.
First, assess safety. Is water flowing onto or near electrical panels, high-voltage equipment, or junction boxes? Is the ceiling or roof deck visibly sagging or deflecting under the weight of water? If the answer to either is yes, the situation may require immediate evacuation of the affected area and a call to emergency services before you call a roofer. Structural failure is a real risk.
Second, contain the damage. Before calling anyone, use buckets, large trash bins, and plastic sheeting to control the water flow and protect inventory, machinery, and assets on the floor. The goal is to minimize interior damage immediately.
Third, document everything. Use your phone to take photos and videos of the active leak, the pooling water, and any damaged assets *before* you begin cleanup. This initial evidence is invaluable for your insurance claim.
Fourth, call for professional help. If you have a pre-qualified emergency roofer, call them now. If not, call TriVAN Roofing’s 24-hour emergency line at 877-487-4826 for immediate dispatch in Texas and Oklahoma. When you need emergency commercial roof repair, a rapid, professional response is critical.
Your 24-Hour Emergency Action Plan: From Crisis to Control
A roof failure feels chaotic, but your response should not be. By breaking the first 24 hours into phases, you can systematically stabilize the building, protect your assets, and lay the groundwork for a successful insurance claim and permanent repair. Time is a critical factor, as materials like wet insulation or drywall can become a mold source within 24 to 48 hours.
The First Hour: Safety, Triage, and Containment
Your absolute first priority is the safety of your personnel. As established, any interaction between water and electricity or signs of structural instability means you stop and call 911 or the appropriate utility company. Once you have deemed the interior space safe to operate in, the focus is triage.
Identify all points of water entry. A single leak at the roof level can travel along the deck or through insulation and appear in multiple spots on the ceiling. Place containment vessels at each point. If the ceiling is bowing from trapped water, it may be necessary to puncture the drywall with a screwdriver or awl to allow it to drain in a controlled way. This prevents a much larger section of the ceiling from collapsing and causing more damage.
The Next Four Hours: Initial Mitigation and Documentation
Once the storm subsides enough for safe roof access, a professional contractor can begin initial mitigation. Under no circumstances should a facility manager or untrained employee access a roof during a storm. A wet, windy roof is an extremely dangerous environment.
A qualified roofer’s first actions will be:
- Identify the Failure Point: The roofer will find the source of the water intrusion, which could be a membrane puncture, a failed seam, a damaged flashing around an HVAC curb, or a clogged drainage system causing water to back up.
- Emergency Tarping or Patching: The immediate goal is to stop more water from entering. This is usually accomplished by securing a heavy-duty tarp over the damaged area or applying a temporary wet-patch sealant. This is not a permanent fix. it is a temporary measure to stop the bleeding.
- Water Extraction: If significant water has accumulated inside, a water remediation crew may be needed to extract standing water and set up industrial dehumidifiers and fans. The quicker the interior is dried, the lower the risk of mold growth and more complex structural damage.
Throughout this process, continue documenting. Photograph the roof damage before any temporary patches are applied. Keep a log of every action taken, who performed it, and when. This documentation is crucial when dealing with storm damage to a commercial roof and the subsequent insurance claim.
Hours Four Through 24: Professional Response and Insurance Notification
With temporary measures in place, the next phase involves coordination and formal communication. First, notify your insurance carrier. Most commercial property policies require the policyholder to report a loss within a specific timeframe, often 24 to 72 hours. Failing to do so can complicate your claim. Your policy also requires you to take reasonable steps to mitigate further damage, which is exactly what the emergency tarping and water extraction accomplishes.
At this stage, you and your contractor will confirm the scope of the emergency work. This is not the time to approve a full roof replacement. You are only authorizing the work necessary to stabilize the building. This agreement should be in writing and should clearly state:
- The exact temporary repairs being made.
- The cost for the emergency service call, labor, and materials.
- Confirmation that this is a temporary stabilization, with a permanent repair scope to be determined later.
This separation is critical for insurance. Emergency mitigation costs are often covered differently than the permanent repair and may not even require pre-approval up to a certain limit. By keeping the paperwork separate, you create a clear record for your adjuster.
What Does Emergency Commercial Roof Repair Cost in Texas?
Pricing transparency is rare in a crisis, which is why predatory contractors thrive. A credible contractor will be upfront about their rates. Facility managers who have been hit with surprise invoices know the value of this honesty. Here are realistic cost structures for emergency response in the Texas and Oklahoma markets. Note that these are for the immediate emergency service, not the final, permanent repair.
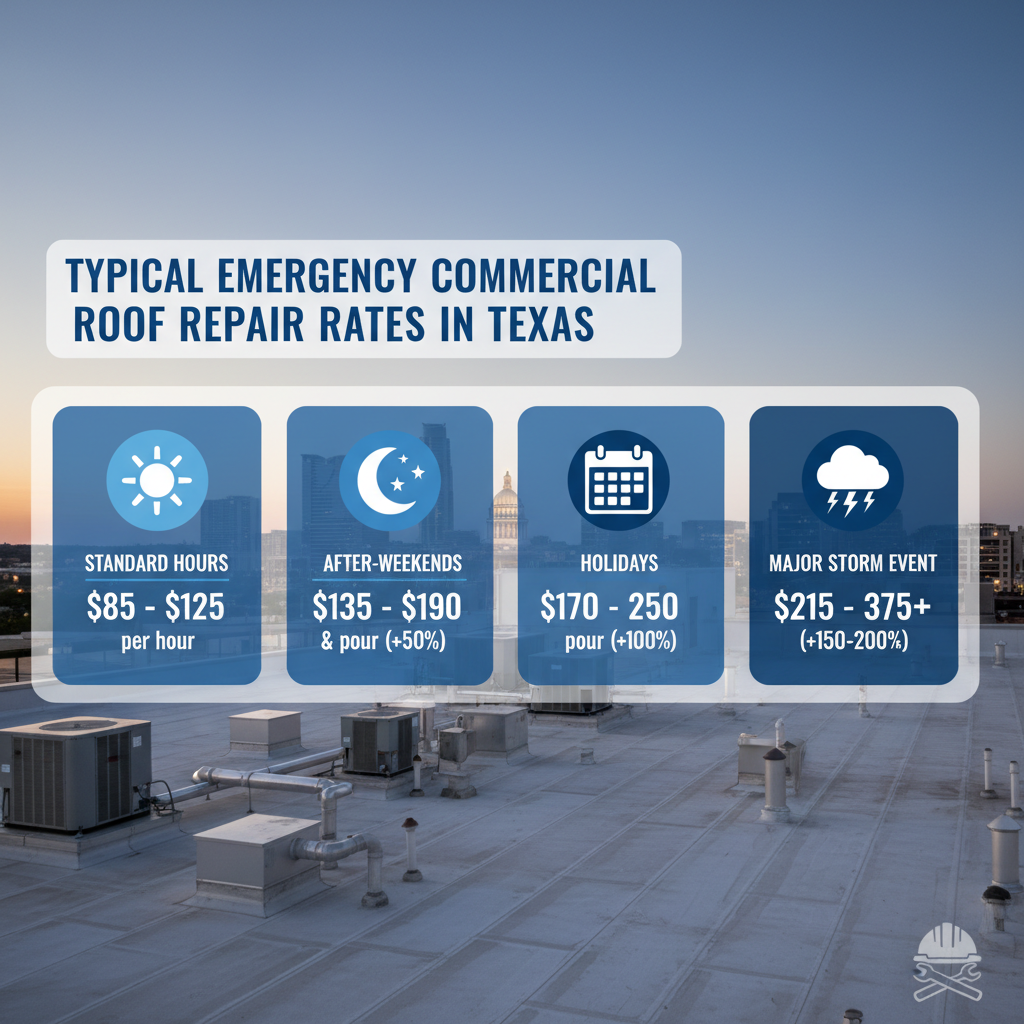
These figures are based on market data from major Texas and Oklahoma metro areas. Understanding them helps you determine if a quote is reasonable or predatory.
Standard Business Hours (Mon-Fri, 8 a.m. - 5 p.m.)
If your emergency is kind enough to happen during a normal workday, you will pay standard rates. For a qualified commercial roofing crew (typically two technicians), this usually falls between $85 to $125 per hour, per technician, plus materials. An emergency tarping job on a standard-sized commercial building might run from $800 to $3,500, depending on the roof's size, height, accessibility, and the extent of the damage.
After-Hours, Weekend, and Holiday Rates
Roof failures rarely respect business hours. For service outside of the standard window, expect a significant premium.
- After-Hours and Weekends: Most contractors apply a 50% premium. This puts hourly rates in the range of $135 to $190 per hour. The same tarping job could now cost between $1,200 and $5,000.
- Holidays: For calls on major holidays like Christmas or Thanksgiving, a 100% premium is standard. Hourly rates can jump to $170 to $250 per hour.
This premium covers the higher overtime wages paid to technicians and the disruption of having crews on standby 24/7.
Major Storm Event Pricing (The Reality of Supply and Demand)
This is the scenario where price gouging becomes a major risk. When a major hail event or hurricane hits a metro area like DFW or Oklahoma City, every contractor in the region is inundated with calls. The demand for services instantly overwhelms the supply of qualified crews. During these widespread emergencies, premiums of 150% to 200% (or more) above standard rates are common. Hourly rates can climb to $215 to $375+ per hour.
While these numbers seem extreme, they reflect the market reality. Reputable companies must pay massive overtime and may even bring in vetted crews from other regions to handle the load. The danger isn't the high price itself; it is the contractor who charges this price without delivering the corresponding expertise and documentation.
How to Avoid Getting Gouged: Red Flags of Predatory Contractors
After major Texas storms, like the hail events of 2021 that produced over a billion dollars in claims, the market is flooded with "storm chasers." These are often out-of-state companies that sweep in to capitalize on the disaster and then disappear, leaving behind faulty work and voided warranties.
The pattern is consistent across Texas and Oklahoma. An aggressive contractor, often from out of state, arrives unsolicited after a storm, promising a quick fix and a 'free' roof paid for by insurance. This is the start of a process that often ends poorly.
In an emergency, you must be vigilant. Here are critical red flags:
- They Found You: A reputable emergency contractor is too busy answering their phone to go door-to-door. If someone shows up unsolicited at your facility, be extremely wary.
- No Proof of Local Insurance/License: Ask for their certificate of general liability and workers' compensation insurance. Make sure the policy is current and the company name matches. An out-of-state policy is a red flag.
- Pressure to Sign an "Assignment of Benefits": This is a legal document that gives the contractor the right to deal directly with your insurance company and receive payment on your behalf. Unscrupulous contractors use this to inflate claims and hold you hostage. Never sign one in an emergency situation.
- Lack of Local, Commercial References: Ask for the names and numbers of three local facility managers they have performed similar emergency work for. A real contractor will have them. A storm chaser will not.
- High-Pressure Tactics: If a contractor pressures you to sign a contract on the spot "before the storm gets worse" or "to reserve a crew," it is a sales tactic, not a professional assessment. Your priority is stabilization, not a full contract.
Choosing an established, local company is your best defense. A woman-owned business with over 24 years of regional experience like TriVAN has deep roots in the community and a reputation to protect. We are not going anywhere after the storm passes.
Emergency Repairs vs. Permanent Repairs: Why the Difference Matters
Facility managers who navigate a roof failure successfully treat the response as two distinct projects: the emergency stabilization and the permanent repair. Confusing the two can be a costly mistake, both for your budget and your insurance claim.
Emergency Repairs are the temporary measures taken to stop the damage. Their only goal is to prevent further water intrusion and mitigate loss until a proper assessment can be made. Examples include:
- Tarping over a damaged section.
- Applying a temporary sealant patch over a puncture.
- Clearing a blocked drain system.
- Extracting water from the interior.
These actions are reactive and intended to last days or weeks, not years. As mentioned, insurance policies typically cover reasonable mitigation costs without extensive pre-approval because it is in the carrier's best interest to prevent more expensive damage.
Permanent Repairs are the long-term solution. This could be a detailed section repair, a roof coating, or a full roof replacement. This work should only happen *after*:
- The weather has cleared and the roof is dry for a proper inspection.
- A qualified contractor has fully assessed the extent of the damage, including moisture within the insulation and substrate.
- The insurance adjuster has inspected the property and approved the scope of work.
Authorizing a permanent repair immediately during a crisis can jeopardize your insurance claim, as the adjuster has not had a chance to verify the damage. By separating the two phases, you ensure your emergency actions are covered and you preserve the full value of your claim for the permanent, high-quality fix your facility deserves, like one from a Duro-Last Elite Contractor.
From Reactive to Proactive: Planning Your Emergency Response Before It’s Needed
The most effective emergency response is the one you planned months or years before the storm. A proactive approach transforms a high-stress crisis into a structured, predictable series of actions.
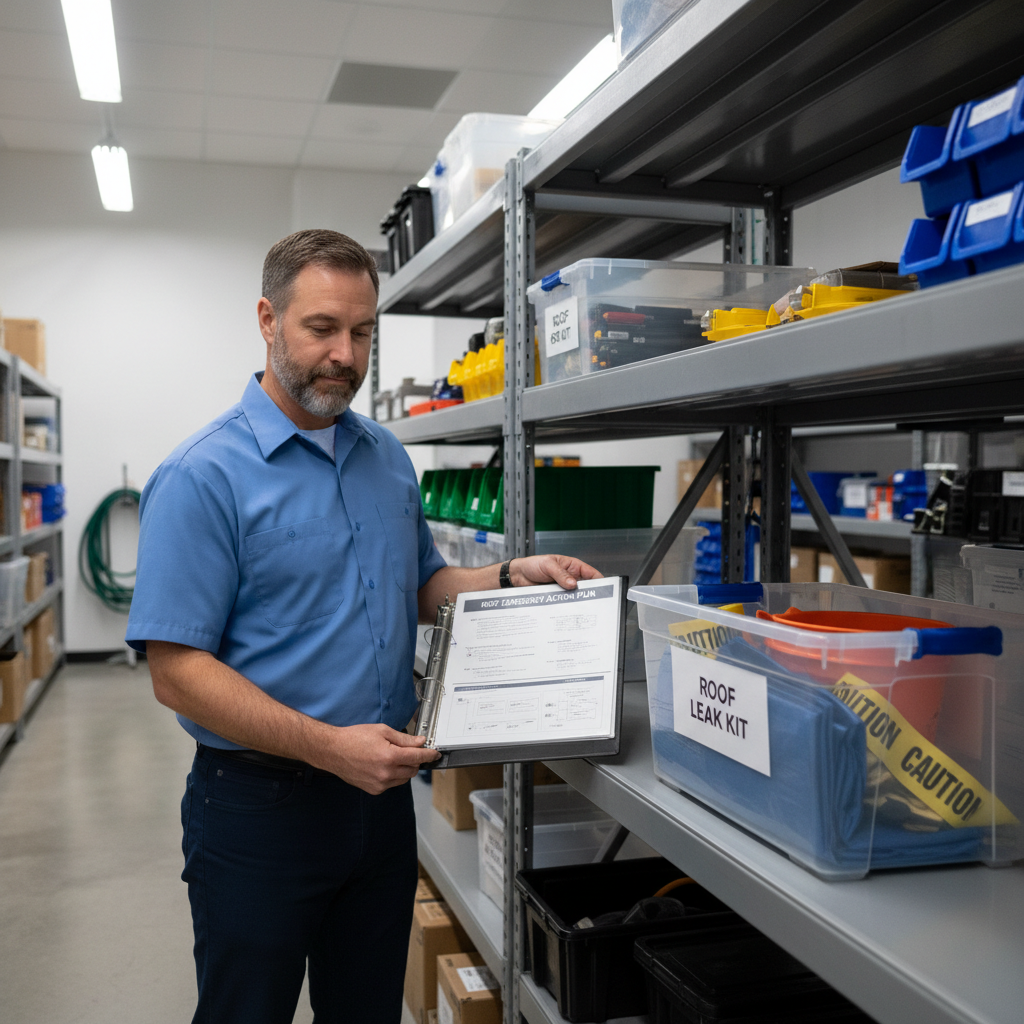
If you are not currently in an emergency, or if you just survived one and want to be better prepared for the next, here are the key components of a solid plan:
- Establish a Relationship: Identify and vet a qualified local contractor *before* you need them. The best option is to have a pre-qualified contractor with a roof maintenance plan. This means they already know your roof, have 24/7 contact information on file, and you know who you are calling.
- Pre-Negotiate Rates: As part of a maintenance agreement, you can often negotiate emergency response rates in advance, protecting you from crisis pricing during a major storm event.
- Pre-Position Supplies: Have a "roof leak kit" on-site with basics like a small tarp, buckets, and caution tape. This allows your team to begin containment immediately.
- Clarify Authority: Ensure facility managers have clear authority to approve emergency spending up to a certain threshold without a lengthy corporate approval process. Delays cost money.
- Document Insurance Info: Keep your policy number, claims hotline phone number, and a summary of your notification duties in an accessible place.
Taking these steps allows you to develop a formal Roof Emergency Action Plan that can save you thousands in damage and business disruption.
Navigating the Post-Emergency Process
Once the temporary patches are holding and the rain has stopped, the work is not over. The post-emergency phase is where you transition from crisis management to strategic asset management.
First, compile all your documentation. Create a single file with your photos and videos, the contractor's emergency invoice, and your log of events. Send this to your insurance adjuster when you file the claim.
Next, schedule a comprehensive permanent repair assessment. This should not be done while the roof is still wet. A proper inspection requires a dry surface to perform moisture surveys and accurately identify all compromised areas. This detailed inspection will produce a formal scope of work and a quote for the permanent repair.
Do not authorize this permanent work until you have coordinated with your insurance adjuster. The adjuster needs to see the damage and typically must approve the contractor's scope and pricing before work begins. Moving forward without the adjuster's green light is the single biggest mistake that can lead to an insurance company denying part of a claim.
By treating the emergency and the permanent repair as two separate, sequential projects, you maintain control, protect your budget, and maximize the value of your insurance policy. If you need help navigating this process, from the initial crisis call to the final permanent installation, contact TriVAN Roofing today. Our 24+ years of experience can bring order to your chaos.
Tags: emergency commercial roof repair Texas, emergency commercial roofing DFW, 24 hour commercial roof repair Dallas, commercial roof emergency repair cost, emergency roof repair Fort Worth TX, storm damage commercial roof repair Texas, emergency commercial roofer Oklahoma City, commercial roof leak emergency Texas, emergency flat roof repair Dallas, commercial roof repair after hail Texas