How to Document Commercial Roof Hail Damage for Insurance Claims in Texas: A Step-by-Step Guide for Facilities
| By TriVAN Roofing | 12 min read
A Texas commercial roof hail claim's success depends on documentation quality, not just damage severity. This guide shows facility managers how to systematically document damage in the first 72 hours to get your claim approved without disputes.
Categories: Safety & Compliance
For facility managers in Texas and Oklahoma, the moments after a hailstorm are critical. As you stand in the parking lot assessing the aftermath, it’s easy to assume that the severity of the damage will determine your insurance claim’s outcome. However, after more than two decades managing commercial roofing claims in the heart of the hail corridor, we know the truth is different. The success of a commercial roof hail damage claim is determined less by the storm's power and more by the quality of documentation you produce in the 48 to 72 hours that follow.
Consider two identical buildings, side-by-side, hit by the same storm. One facility manager casually snaps a few photos and waits for the adjuster. The other follows a systematic documentation protocol. The difference in their claim outcomes can be immense. This is not speculation. Denials based on insufficient documentation are one of the most common hurdles for commercial property owners in Texas, a state that sees an average of 902 major hail events annually. This guide provides a step-by-step process for documenting damage to the standard that insurance adjusters require, helping you build an undeniable case for your claim.
The First Hour: Immediate Actions After the Storm
Once the storm has passed and it is safe to move around outside, the clock starts. Your actions in this first hour set the stage for the entire claims process. There are three non-negotiable steps.
1. Conduct a Safety Assessment
Before anyone sets foot on the roof, safety is the absolute first priority. Conduct a ground-level assessment for immediate hazards. Look for downed power lines, large debris, and signs of structural stress. If you have significant ponding water, be aware of the roof's load capacity. A structurally compromised roof is a serious danger. If you have any doubts about the building's structural integrity, prevent all access and call a structural engineer and your roofing contractor immediately.
2. Notify Your Insurance Carrier
Nearly all commercial property insurance policies have a clause requiring prompt notification of a loss. This timeframe is often between 24 and 72 hours, but you should do it as soon as possible. Calling to notify your insurance carrier starts the official claim process and logs the event date. This call does not require a full damage report. Simply state your property's location, the date and time of the storm, and that you have sustained potential hail damage that you are beginning to assess. This simple notification satisfies your policy requirement and gets a claim number assigned to your case.
3. Document the Weather Event Itself
Your claim needs to prove that a covered event—in this case, a hailstorm of sufficient intensity—occurred at your specific address. Insurance carriers sometimes dispute this, claiming the hail at your location was not large enough to cause damage. You can shut down this argument before it begins. Take screenshots of local weather reports, radar images showing the storm over your property, and any local news coverage. More importantly, you will later want to obtain official storm data to cement your case.
The Roof Documentation Protocol: Your Most Critical Task
This is where most claims are won or lost. A thorough, methodical approach to documenting the roof itself provides the core evidence for your claim. Vague, poorly lit, or unscaled photos are easily dismissed by adjusters.
Essential Equipment
- High-Resolution Camera: A modern smartphone with location and timestamping enabled is usually sufficient. Ensure your camera lens is clean.
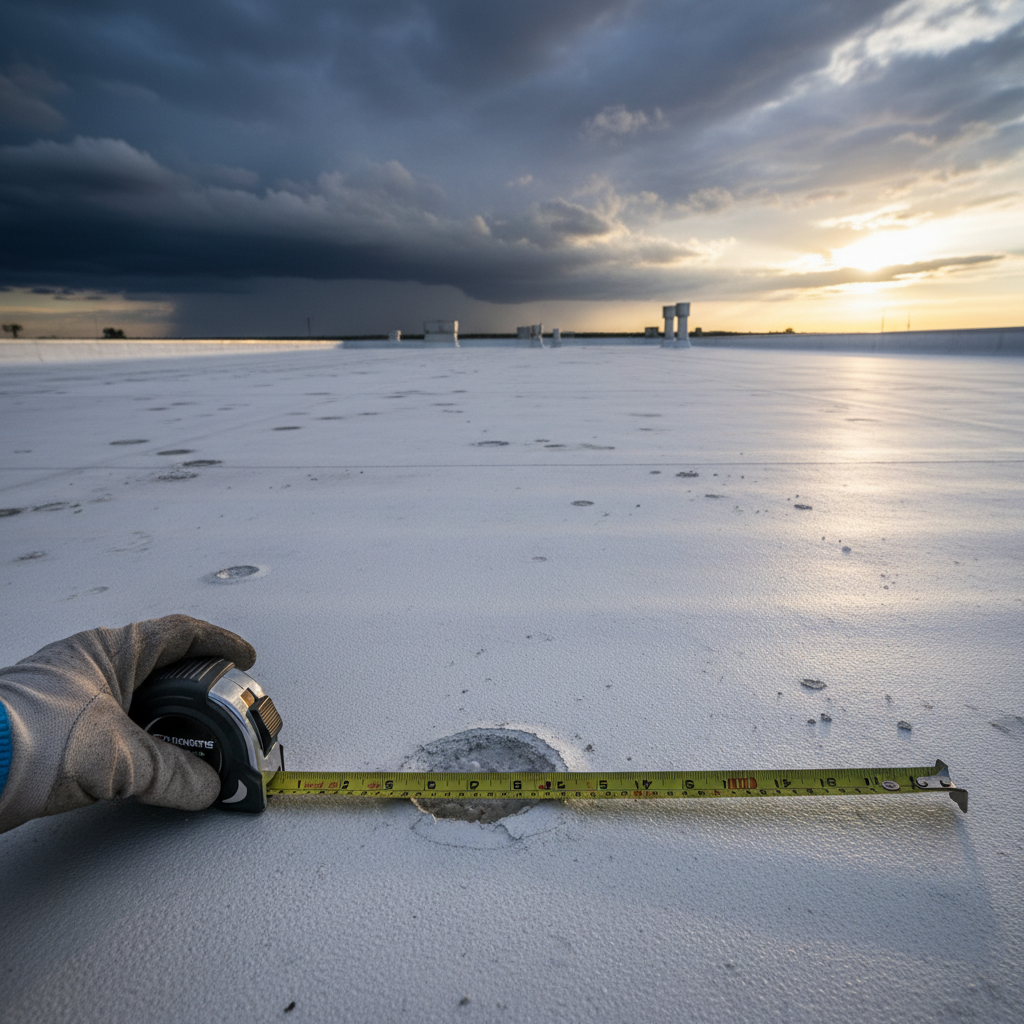
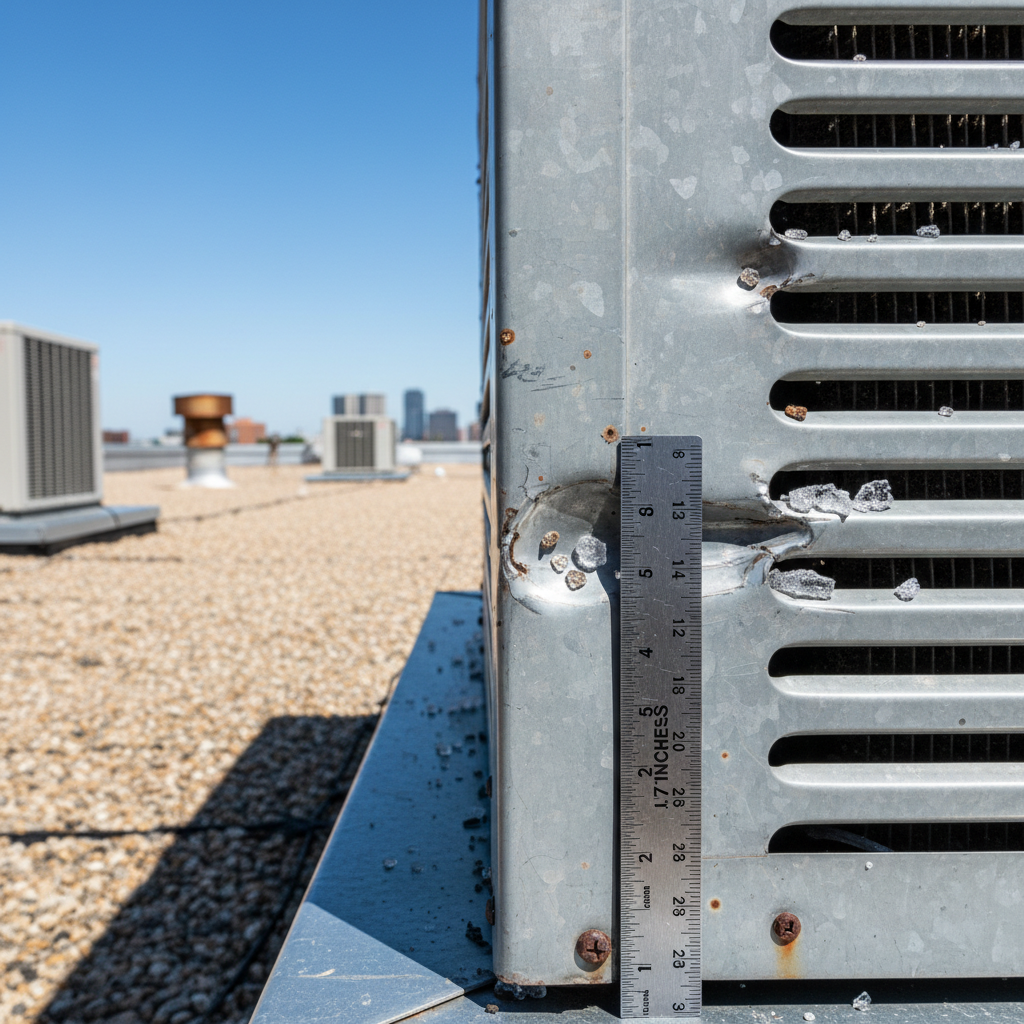
- Scale Reference: A tape measure is best. A ruler or a coin of known size (like a quarter) also works. This is not optional; unscaled photos of impacts have little evidentiary value.
- Notebook and Pen: For taking written notes, labeling photo groups, and drawing simple diagrams of damage locations.
- Drone (Optional but Recommended): For large or difficult-to-access roofs, a drone provides invaluable aerial shots showing the overall pattern and density of hail strikes.
Required Photographic Evidence
Your goal is to tell a complete story with photos. An adjuster who has never seen your property should be able to understand the extent of the damage just from your documentation. Capture the following:
- Establishing Shots: Take wide-angle photos of each roof section from multiple corners. This shows the roof's overall pre-existing condition and the general area where damage occurred.
- Impact Close-Ups with Scale: This is the most important part. For every type of damage, take a close-up photo with your tape measure or reference object placed directly beside it. For hail impacts, this documents the diameter. Hail typically ranges from dime-sized (0.75 inches) to golf-ball-sized (1.75 inches) or larger, and policy coverage often depends on hail size.
- Impact Pattern Photos: Take photos from a low angle across the membrane surface. This can show the pattern of impacts, whether they are scattered randomly or concentrated in specific zones. This tells the adjuster about hailstone size, wind direction, and storm intensity.
- Granule Loss Documentation: On asphalt-based systems like modified bitumen or cap sheets, hail scours away the protective ceramic granules, exposing the underlying asphalt to UV degradation. Photograph the areas of granule loss on modified bitumen or cap sheet systems, and be sure to photograph the granules that have collected in gutters and around downspouts.
- Membrane Punctures: If any hailstones have punctured the roof membrane, document these with extreme care, both up close with scale and from a wider view to show the location. These are critical findings that often necessitate immediate emergency repairs.
- Damage to Metal Components: Do not forget to photograph dents and damage to metal flashing, coping, roof vents, HVAC curbs, and equipment housings. Dents in metal serve as a perfect, permanent record of the hail's size and force.
- Drainage Systems: Photograph gutters, scuppers, and drains to show any blockage from hail, leaves, and granule debris washed off the roof. Clogged drains can lead to ponding water, which causes a host of other problems.
Written Notes: Connecting Photos to Locations
A folder of 200 photos is useless if the adjuster cannot tell what they are looking at. Your notebook is for context. Create a simple roof map and divide it into sections (e.g., Northwest Quadrant, Section Over Offices). As you take photos, log them. For example: "Photos 25-42: NW Quadrant, close-ups of 1.5-inch impacts on TPO membrane. Photos 43-48: Same section, dents on HVAC unit #3 housing." Write location notes for each photo grouping identifying which roof section and approximate coordinates so the adjuster can correlate photos to specific areas during their inspection.
Don't Neglect the Interior: Documenting Water Intrusion
Many facility managers focus entirely on the roof, forgetting that the consequences of the damage are often most visible inside. If water has entered the building, documenting it correctly is essential for getting your interior repair and contents claims paid.
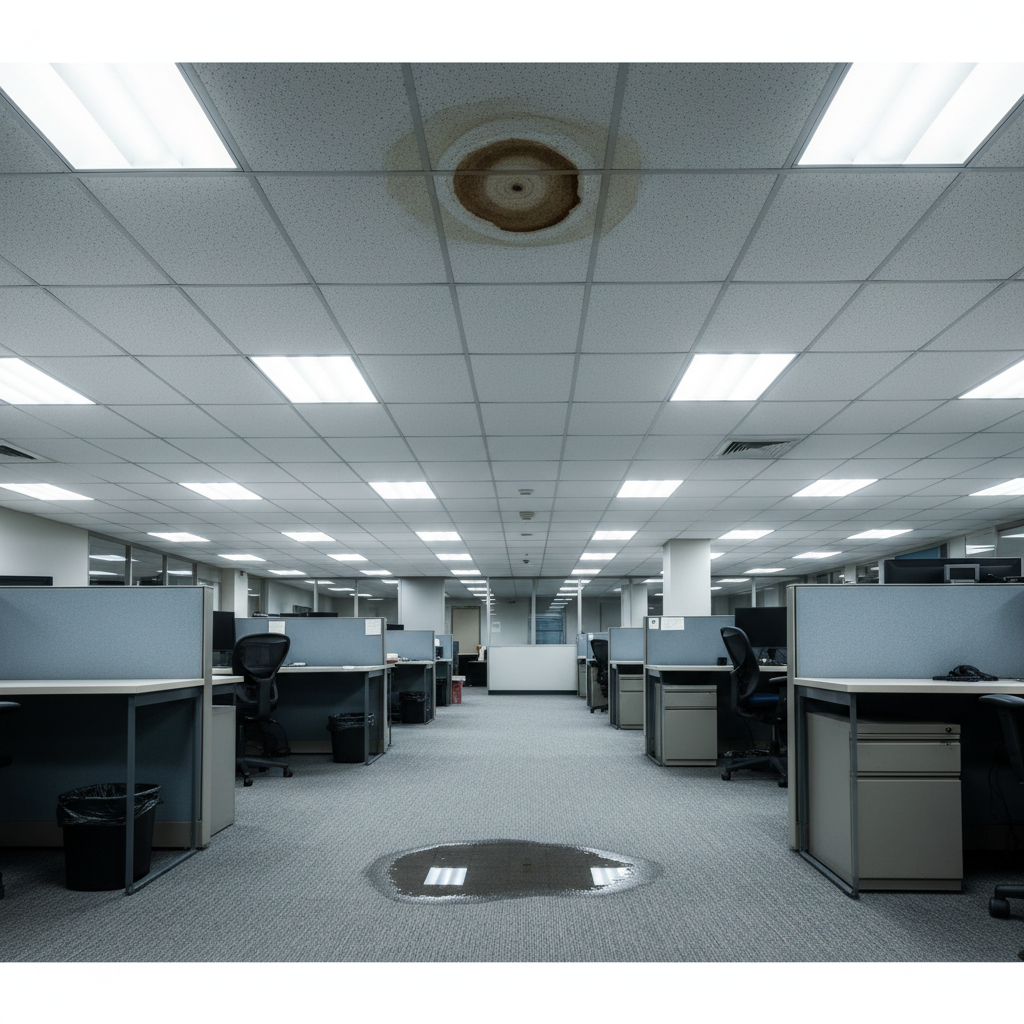
Any water intrusion visible inside the building should be photographed before any cleanup, including ceiling staining, wet insulation in ceiling cavities, water on floors, and damage to contents. The sequence matters from a claims perspective. If you remove and discard stained ceiling tiles or mop up all the water before taking pictures, you have effectively destroyed the evidence. The adjuster arriving two days later has no way to verify the extent of the initial intrusion. If you must begin cleanup for safety, photograph the process itself. Take pictures of the saturated materials you are removing. Your documentation should prove the link between the roof damage and the interior damage.

Strengthening Your Claim with Third-Party Validation
While your own documentation is the foundation, supplementing it with expert, third-party reports can make your claim virtually undeniable. There are two key sources for this validation.
The Professional Damage Assessment Report
A post-storm roof inspection from a certified, experienced commercial roofing contractor provides a level of credibility that is difficult for an insurance carrier to dismiss. This report should include the contractor’s credentials, a detailed narrative of their findings, a full set of their own documentary photos, and specific recommendations for repair or replacement with cost estimates. This third-party report carries more weight with insurance adjusters than building owner documentation alone because it represents an independent professional assessment rather than a self-interested party's documentation of their own property. The timing is important. Getting a contractor on the roof within 48 to 72 hours ensures the report is based on fresh evidence and can be correlated with weather data.
Official Weather Data: The NOAA Storm Report
To definitively prove the storm's characteristics at your location, you can request a certified storm report from the National Oceanic and Atmospheric Administration (NOAA). Their National Centers for Environmental Information can produce a report for your specific address and date, which will officially document meteorological data, including whether hail was detected and its estimated size. This government-issued document is considered objective fact by insurance carriers and is the ultimate tool for resolving any disputes about whether a covered event occurred.
Emergency Mitigation: Protecting Your Property and Your Claim
Your commercial insurance policy contains a requirement that you, the property owner, take reasonable steps to mitigate further damage after a loss. For a hail-damaged roof, this means preventing a bad situation from getting worse. This could involve having a contractor apply temporary tarps over punctured areas, arranging for water extraction from saturated interior spaces, or moving sensitive equipment and inventory out of harm's way.
Failure to mitigate can severely impact your claim. If you don't cover a hole in the roof and a second rainstorm a week later causes massive interior water damage, the carrier can argue that this subsequent damage was due to your negligence, not the original hailstorm. They could then refuse to pay for that portion of the damage. The good news is that reasonable emergency mitigation costs are almost always covered by the policy, often without needing pre-approval. Document all mitigation actions with photos and keep meticulous records of all associated costs. These will become part of your overall claim.
Understanding Supplemental Claims: Recovering Costs for Hidden Damage
Many building owners mistakenly believe the initial estimate from the insurance adjuster is the final word. This is rarely the case. Adjusters can only report on the damage they can see. The true extent of hail damage is often hidden beneath the roof membrane.
When permanent repairs begin and the roofing contractor starts tearing off the old system, they may discover saturated insulation, damaged decking, or compromised flashing that was not visible during the initial inspection. These are legitimate, storm-related damages covered by your policy. The costs for addressing this hidden damage are submitted as supplemental claims. The documentation standard is the same: photograph the newly discovered damage, describe it in detail, and have your contractor provide an estimate for its remediation. Facility managers who are unaware of the supplement process often end up paying for this work out of pocket, leaving thousands of dollars on the table that their policy should have covered.
A Warning for Texas Business Owners: Identifying Storm Chasers
Major Texas hail events, like the storms in 2025 that led to $1.4 billion in claims for State Farm alone, attract a flood of out-of-state contractors. These "storm chasers" blanket affected areas, going door-to-door offering "free inspections." While tempting, engaging with them is risky. Common red flags include high-pressure sales tactics, demand for a large upfront payment, and an address that is only a P.O. box or a temporary local motel.
The problems are numerous. They may perform substandard work, disappear after cashing an insurance check, and offer a "warranty" that is worthless once they leave the state. Awarding a contract before your adjuster has even inspected the property can create major disputes about the scope and cost of work. The best way to avoid this is through pre-established relationships with certified local contractors. When a storm hits, you are calling a trusted partner, not vetting a stranger who appeared in your parking lot. A local, established company has a permanent presence, a reputation to uphold, and will be there to service your roof for years to come, which is essential for managing a major asset like your roof, especially in an area with constant hail risk like hail damage commercial roofing DFW.
Navigating a commercial hail damage claim is a complex process, but it is not a mystery. By focusing on systematic, evidence-based documentation from the very first hour, you take control. You provide your insurance carrier with the proof they need to do their job, minimizing disputes and delays. This diligent approach ensures you receive a fair settlement that fully covers the cost of restoring your commercial roof to its pre-storm condition.
After a severe storm, your focus is on documenting damage and securing your facility. Let our team handle the complexities of the inspection and reporting. TriVAN Roofing brings over 24 years of experience in the Texas and Oklahoma hail corridor. As a GAF Master Elite and Duro-Last Elite Contractor, we provide the expert, third-party documentation that insurance carriers respect. We work with your adjuster, providing detailed reports and precise estimates to ensure all damage is accounted for, from the membrane surface to hidden deck issues. Our status as a TIPS Vendor simplifies the procurement process for public entities. Don’t navigate the claims process alone. Contact TriVAN at 877-487-4826 for a comprehensive post-storm inspection.
Tags: commercial roof hail damage documentation, commercial roof insurance claim Texas, hail damage roof inspection Texas, commercial roof storm damage documentation, how to document hail damage commercial roof, commercial roof insurance claim process, hail damage commercial roofing DFW, storm damage commercial roof Oklahoma, commercial roof claim denied documentation, NOAA storm data insurance claim